5 Tips for Quality Photo Scanning
Biff Barnes
One of the great things the digital age has done for book publishing is make it easy than ever before to create an illustrated book. One of the keys to producing a beautiful illustrated book is having high quality images to work with. That means good scanning is essential. Here are five tips to help you make sure you have well scanned images to illustrate your book:
Courtesy of USB Learning Commons under Creative Commons
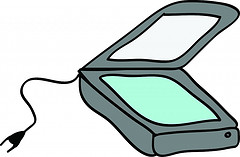
Use a Flatbed Scanner: Photos should be hand scanned on a flatbed scanner to prevent bending. The scanner settings can be adjusted specifically to the size and condition of the original. PC Magazine advises that you use a sheet feed scanner only “…if you'll be satisfied with scans that are suitable for viewing onscreen or reprinting at the same size—although with noticeable color shifts and loss of resolution…” This certainly wouldn’t be suitable for a photo you intend to use in a book.
Scan at a High Resolution: Scanning photos for books at 300 dpi is a minimum acceptable level but 600 dpi “is generally the sweet spot for photo scans,” says Adam Dachis in Life Hacker’s Step-by-Step Guide to Digitizing Your Life. What is important to realize is that when you have a smaller photo that you would like to enlarge, to maintain image quality, the initial scan must be at an even higher resolution. For example, if the photo is 2”x 4” and you wish to blow it up to 4”x 8”, it should be scanned at a resolution of at least 600 dpi. We advise scanning at the highest resolution possible. Even the most humble scanner today will scan at 1200 dpi. With scanning, bigger is always better.
Check Your Scanner Settings: Scanners come with software, but after installing it many people treat their scanner like a point and shoot camera. Don’t! Take the time to go into your scanner software settings. Make sure the resolution is set at an appropriately high level as discussed above. Set the output size for Flexible. The photos you scan will be of different sizes. Set the scanner to autocrop the image or use the guides to select your image so that you don’t scan the entire plate, just the photo itself.
Scan One Image at a Time Unless You Use Batch Mode: You’ll want each image you scan to become a separate file. If you place more than one photo on your scanner’s bed and click scan, the scanner will treat everything it sees as a single image. You don’t want that. Some scanners can be set for Batch Mode which will allow you to scan multiple images, but create a separate file for each image.
Save Images in a Lossless Format: The default on many scanners is to save images as a JPG. This is a ‘lossy’ format. Richard Matthews, Chief Information Officer at Wake Forest University explains why this can be a problem, “You will often hear the terms ‘lossy’ and ‘lossless’ compression. A lossless compression algorithm discards no information. It looks for more efficient ways to represent an image, while making no compromises in accuracy. In contrast, lossy algorithms accept some degradation in the image in order to achieve smaller file size.” What lossless format should you “save as”? TIFF is best, and the option is available on almost all scanners, so look for it and use it as your default.